Low Country (but actually Brooklyn) Boil

This past week, as I often do during the warmer months, I stood by our kitchen window and practiced my all time favorite of the New York deadly sins: coveting thy neighbor's backyard. You see, we live on the second floor of our brownstone. Directly beneath our giant kitchen window is our downstairs neighbor's beautiful patio. There's enough space for a deck, a grill, a basketball hoop, even a tree! I stare longingly at their garden as I sip my coffee and imagine all of the outdoor meals I'd love to enjoy if we only had the same. Except, if we had a backyard, I'd refer to it exclusively as "dining al fresco". People would text and ask what we're up to and I'd say, "Oh! We're just dining al fresco in our garden." Or, "Oh! Sipping some wine before we break out the cheese plate, al fresco." I'd wear white linen round the clock and my baby would never spit up on it. Also, we'd have central AC and a dishwasher in this fantasy because why not throw that in while we're dreaming.

Unfortunately, and for the foreseeable future, having an outdoor space of our own is out of the question. The rent on an apartment with a backyard equals roughly Ben's daycare cost so I guess this is where I choose the kid over the patio, right? As much as I would love to host a BBQ, for the time being we're relegated to hosting indoors. Which, to be totally honest, is quite nice if you approach the whole endeavor with a bit of creativity and remind yourself that it's too damn hot to be outside and your Eastern European skin can't handle anything over 80ºF anyway. 

6ED75D0C-41EC-4948-98C8-94EFD40DA088.JPG

So, in light of still wanting contact with the outside world while on maternity leave, but also not wanting shell out for a babysitter - we decided to host. To keep thing simple and not super labor intensive Ian made his recipe for a low country boil. Corn, potatoes, onions, shrimp. He's made it a few times now and it comes together beautifully every time. To switch things up a bit we moved the living room table and set it up for standing and picking. The entire meal took less than an hour to prepare and the clean up was blessedly simple. I topped everything off with banana pudding for dessert because it's not officially summer until there's banana pudding. Honestly, backyard or no backyard - lovely friends, cold beer, and delicious food are what make this season what it is. Ok, enough with the cheesy stuff - hope you make this and enjoy as much as we did! 

IMG_4055.jpg


Low Country Boil

Ingredients

(we doubled this recipe in two large pots and it was plenty for 7 people.)

  • 2 lbs peeled shrimp

  • 1 lemon, quartered

  • 3 stalks corn, halved

  • 1 large sweet onion, quartered

  • 1 large link smoked turkey sausage, sliced into 1/2 inch pieces

  • 4 red potatoes, quartered

  • 1 clove garlic, minced

  • 1/2 stick butter

  • Old Bay, 1/2 cup

  • 3 tbsp salt

  • 2 tbsp pepper

  • 2-3 bay leaves

  • 1 lemon for drizzling

  1. Fill a large pot with cold water about 3/4 of the way.

  2. Put the old bay, lemon, salt, pepper, and bay leaves into the water. Let this "marinade" sit for 20-30 min before cooking.

  3. Bring mixture to a boil and put in potatoes. Keep the water boiling and 5-7 min later put in sausage and onions. 5 min after that put in the corn.

  4. Once the corn and potatoes seem firm but tender to the touch, put in the shrimp until it turns pink.

  5. Drain everything and toss on a tray. We chose aluminum for easy clean up.

  6. Melt the butter with the garlic in a small sauté pan and drizzle on the cooked food.

  7. Squeeze lemon on top.

  8. Serve immediately.

238E11D5-9BAF-4E34-86A7-48208B61FA18.JPG
A558694A-AC8A-41CD-B607-6F1E5C7558F0.JPG
7D400F7B-97AF-4175-8817-CB5749F46358.JPG
IMG_4053.jpg
IMG_4057.jpg


Almond Meringue Cookies + It's Spring! (sort of?)

Finally, after weeks of the same notification from Alexa, "41 degrees and cloudy with a chance of flurries", today felt like Spring. The last few weeks the days have been so grey it feels like we've been in an endless tug of war with winter. Opening the windows to let in a fresh breeze felt spectacular. Just what I needed to get into gear to finish off my last week of pregnancy on a super positive note.

Growing my very own watermelon!

Growing my very own watermelon!

More so than in previous posts, this year I feel like pressing RESET on everything. No surprise, really. At 38.5 weeks pregnant I am the size of a watermelon and nesting hard. My brain feels like scrambled eggs except when it comes to organizing closets, creating freezer meal plans, and reshuffling the pantry for baby bottle storage. Also, I channeled all of my neuroses and folded every single towel we own into a perfect square. I am told this is entirely normal behavior one week before your entire life changes. 

In an effort to curtail irrational terrorizing of every linen closet and resorting of paper towels and pillowcases (for the third time in two weeks), I spent this week letting all my anxious energy out through transforming the apartment for warmer weather. 

Over the last few days I arranged fresh flowers and put away everything that reminds me of winter: no more boots and no more puffy marshmallow pregnancy coat! Referencing seasonal posts from years past really helped me figure out what to tackle and stay motivated. In no particular order and with as much energy as my very round self could muster, I attacked each of the below. Hope this burst of warmth is as motivating to you as it was to me. Each post is linked so click away!

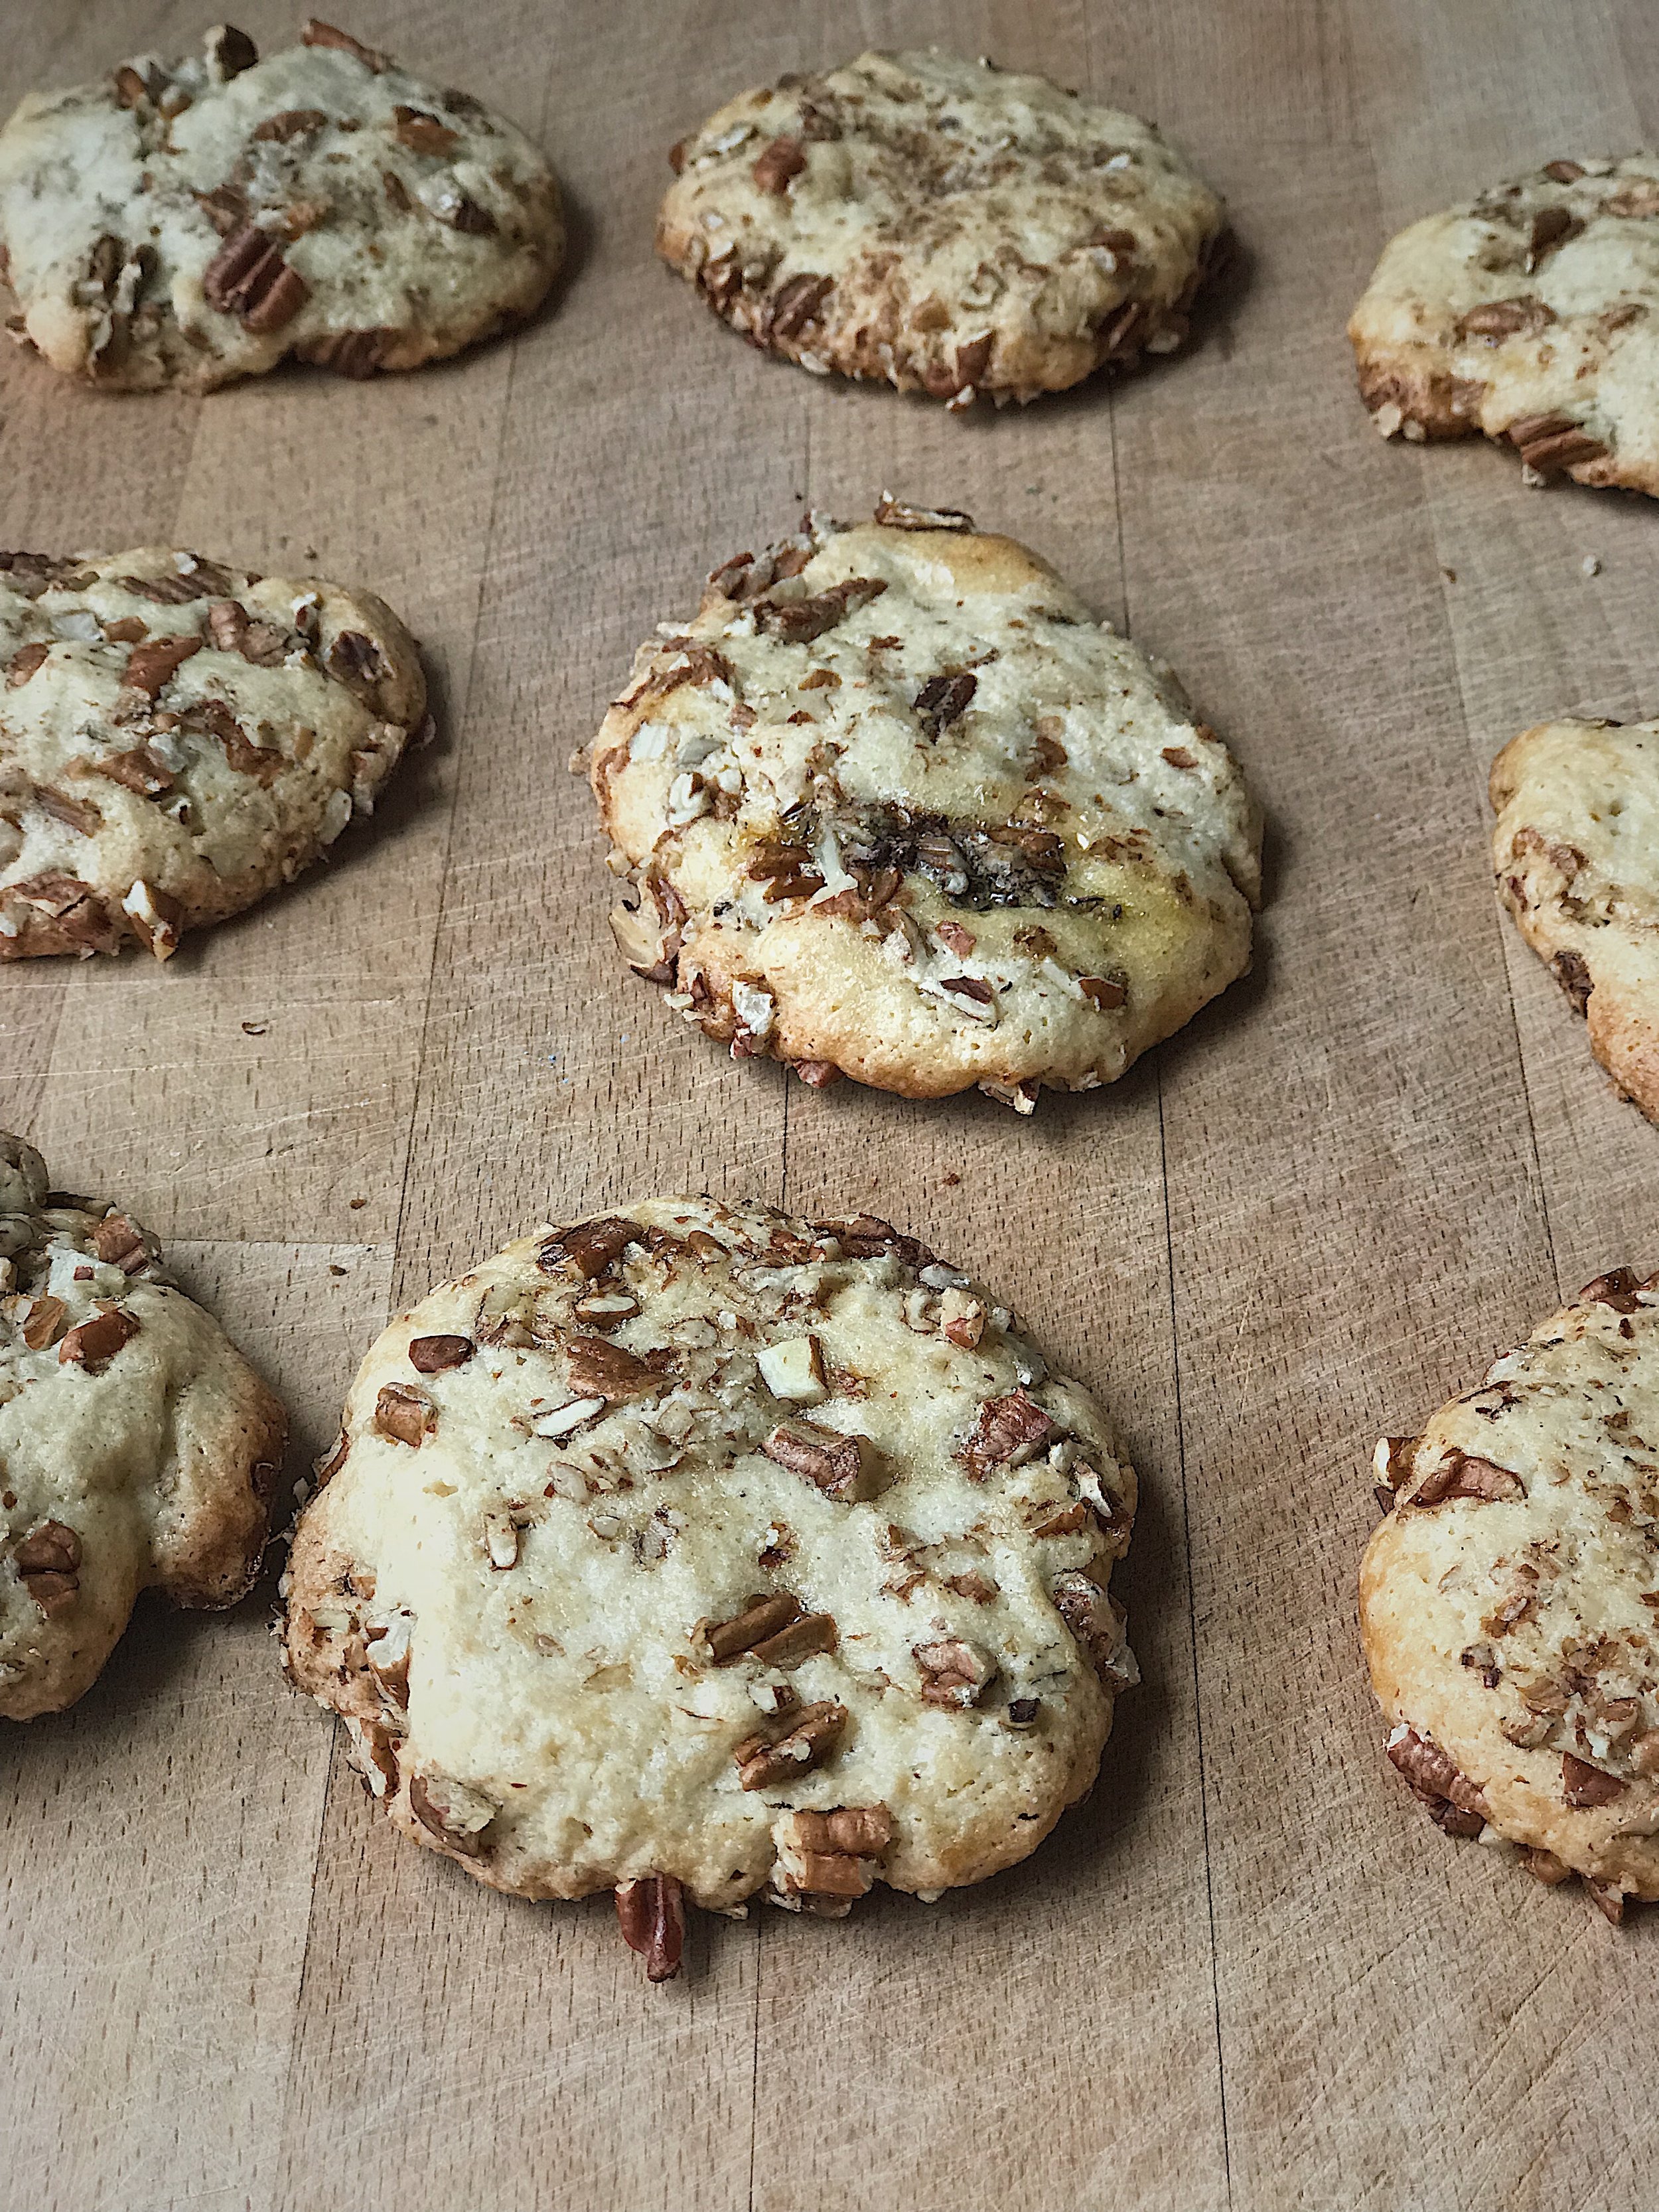
Then, once my home was relatively in order - I baked the best cookies of my entire life. For the record, cookies have never been my forte and they've never been my favorite. I'm mostly a chocolate chip girl and only on very rare occasions (somehow, cookies never satisfy a craving for me the way ice cream or brownies do.) That completely changed when I made these. I've made them twice since Passover (they're gluten/flour/leavening free) and vowed to never let my cookie jar be empty again.

Not too sweet, not too crunchy, not too soft. If I am the Goldilocks of cookies I finally found my perfect fit. Ok, I'm awful at analogies but these are SO good. Please forgive me, and make them this weekend! 

629FEE11-5CA0-4255-966A-33F948AF269D.jpg

Almond Meringue Cookies

Ingredients

  • 3 cups almond flour
  • 4 egg whites room temperature. reserve one for later in a separate cup. 
  • 1/3 cup buttermilk or whole milk
  • 1 cup sugar
  • 1 tsp. vanilla
  • pinch of salt
  • rough chopped almonds, pecans, or walnuts
Meringue before I folded it into the dry ingredients. It will deflate as you incorporate it into the mixture.

Meringue before I folded it into the dry ingredients. It will deflate as you incorporate it into the mixture.

  1. Preheat over to 300F. 
  2. Beat 3 egg whites and the pinch of salt in a bowl with an electric mixer until stiff peaks form. The trick to egg whites is that all of your equipment must be totally dry. Not a single drop of water anywhere! Like the desert but even less. (Thanks, mom for this tip! Only took me 2-3 years to ask why I couldn't manage "stiff peaks".)
  3. Combine all dry ingredients. 
  4. Gently fold the meringue into dry ingredients.
  5. Add buttermilk and vanilla.
  6. Stir to combine into dough. It will be very, very sticky.
  7. Chill in the refrigerator for 15 minutes. 
  8. While the dough is chilling chop up your toppings and remember the egg white you set aside in a separate bowl. I used pecans but honestly any nut or even chocolate chips would work.
  9. Scoop up slightly smaller than golf ball chunks of dough, roll into a ball.
  10. Coat cookie dough ball in egg white followed by topping of choice. Flatten into patty... or cookie. Cookies are a type of patty, right? Whoa.
  11. Place on greased baking sheet or parchment paper.
  12. Bake cookies for 15- 20 min, until edges are a bit brown. Cool and then eat. Duh!


IMG_E3235.jpg
IMG_3238.jpg
IMG_3237.jpg


Guest Post: Prep Your Space for Spring!

Well, hello there! I'm Sara, but my friends call me Bee. My love for interior design started around the age of 7, when I began insisting on rearranging my bedroom every week. After graduating from High Point University with a BS in Interior Design, I put my love for color and composition to the test with a career in visual merchandising. The Burrowing Bee first came about in 2011 as a creative outlet and homage to everything design. It's ever evolved since then, with the purchase of my first home, a 1940s bungalow in dire need of a fix-up. I've recently ventured out on my own in the hopes of helping people all over achieve the places and spaces of their dreams, while continuing to share as I create my own. Need help with your space, but don't know where to start? Let's set up a consultation, I'd love to help!

Prep Your Space for Spring!

The weather down south has been teasing us lately, 80 degrees here, 40 degrees there. Every day I wake up not knowing if I’ll be walking the dog in flip flops or cozy boots. Nevertheless, I’ve started getting ready for the warmer weather by taking these seasonal, never fail steps. Who doesn’t love a change of season! Here are four ways to prep your apartment for spring without spending a fortune!

Step One: Add Greenery

Not only do plants liven up a space, but choosing the right ones can really clear up the air. Spider plants, English ivy, and rubber plants to name a few, are great oxygen creating choices. You can display them all together, or spread them out throughout the house for little lively points of interest.

Step Two: Lose the Layers

I love cozying up under a stack of blankets and pillows as much as the next person, but there’s something so refreshing about peeling away the layers. Fold up your blankets and keep them near by in a cute basket or on top of a side chair. You’ll still have easy access for those days when all you want to do is take a nap with the windows open. A coverlet or quilt is a great lightweight, spring option to keep handy!

Step Three: Clear the Entryway

Whether you’re in the city or down south, there is nothing more annoying than a cluttered entryway. Piles of shoes and winter coats make for a depressing first impression, and hallelujah it’s time to clean them up! Tuck the winter coats away in the closet or underneath a bed. You can style your hooks with your go to grocery bags and a pair of rain boots, just in case. Just past the front door is a great spot to showcase your favorite spring time hats as well!

Step Four: Organize

This is my last and personal favorite step! Maybe it’s weird, but I organize when I’m anxious (or happy, or sad, or awake). The first thing we did when we bought our house was replace the cabinets surrounding the kitchen window with open shelves. This immediately flooded our otherwise seemingly small kitchen with light and gave us plenty of display space for our favorite baking necessities. Whether it’s shelves, rails, or hooks, you can’t go wrong with organizing out in the open. Add some greenery to the mix and you’ve got yourself a fully loaded Spring time kitchen. Now, don’t you feel better?